Registering the Business Central application on Azure is required when configuring OAuth authentication. Follow the below steps to register D365 BC app in the Azure portal.
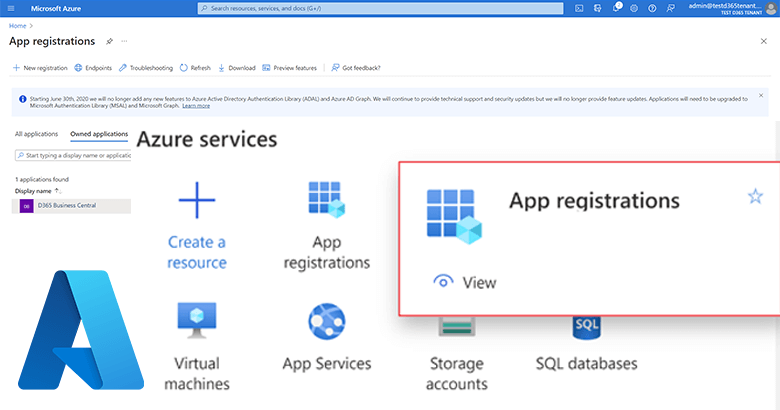
- Log in to the Azure Portal and select “App registrations” under Azure services.
- Click on the “New registration” button:
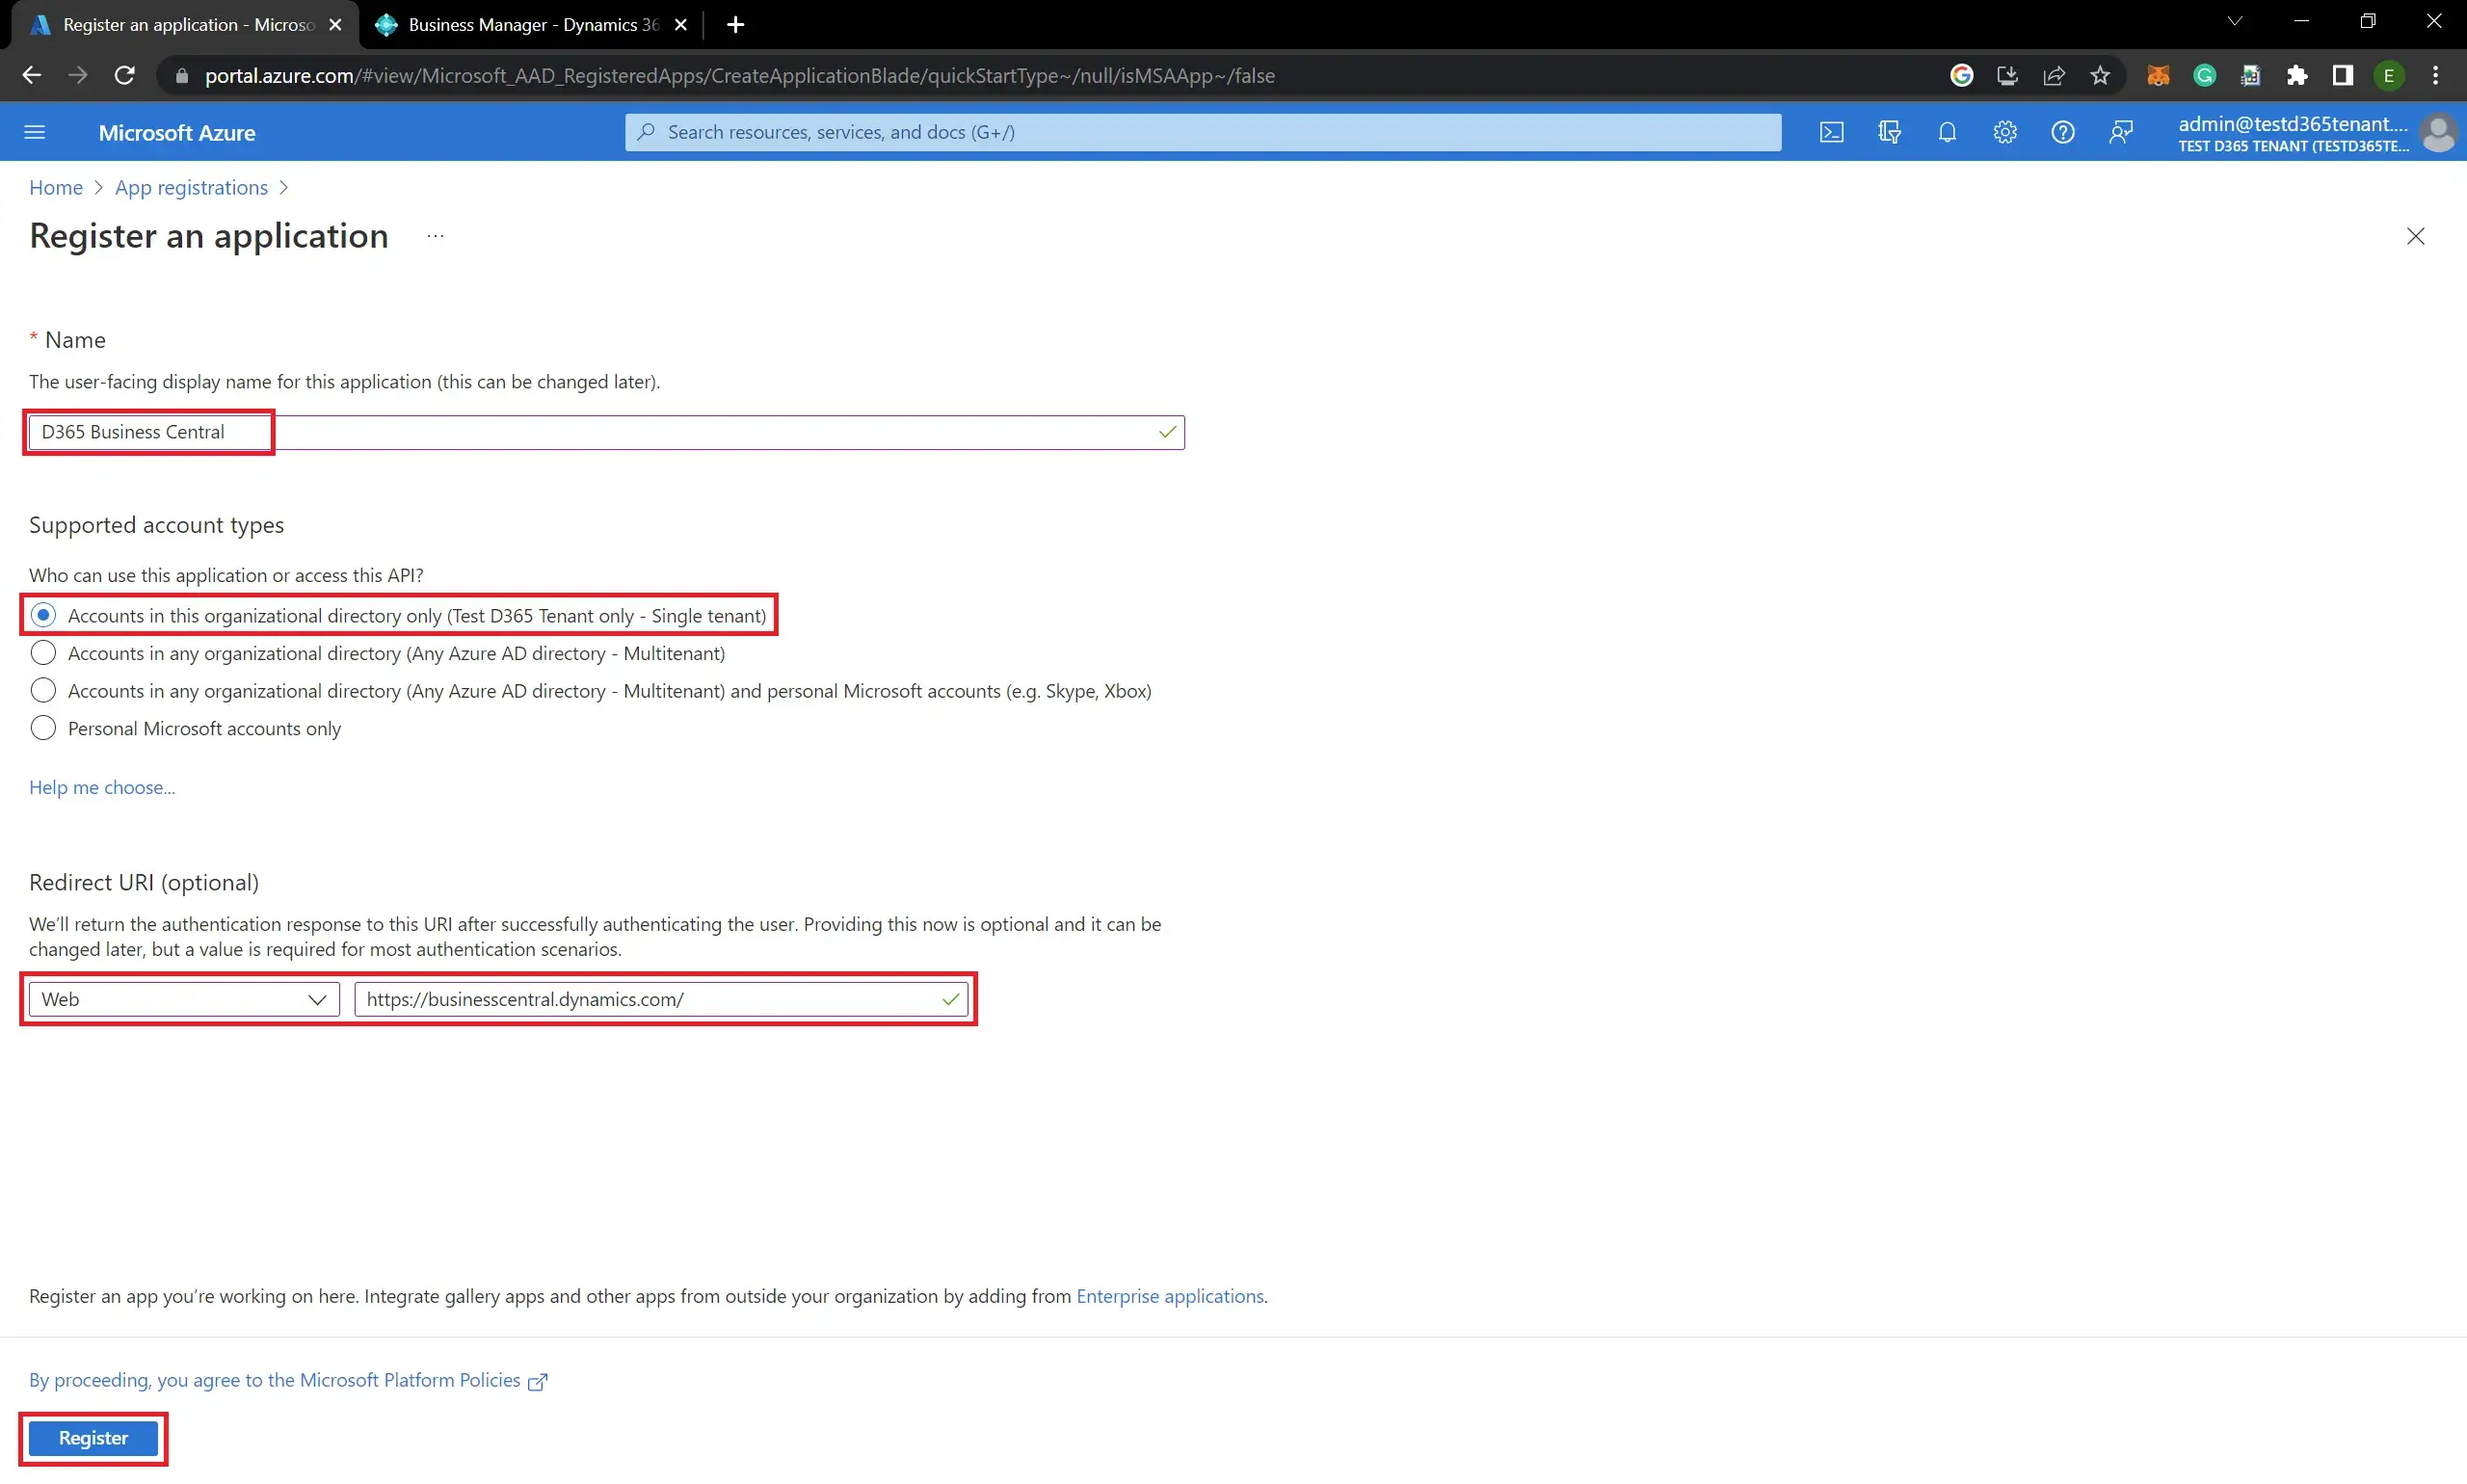
- On the “Register an application” page enter the following details and click on the “Register” button:

- Name (Name of your application).
- Supported account types:
select “Accounts in any organizational directory (Any Azure AD directory – Multitenant)” if you want to allow access to your app from any Azure AD tenant, or “Accounts in this organizational directory only (Single tenant)” if you want to limit access to your app to a specific Azure AD tenant. - Redirect URI (optional):
Select “Web” and enter the redirect URL for your BC app. This is the URL where your app will receive the authentication response. I add the URL as: https://businesscentral.dynamics.com/ for the BC cloud version.
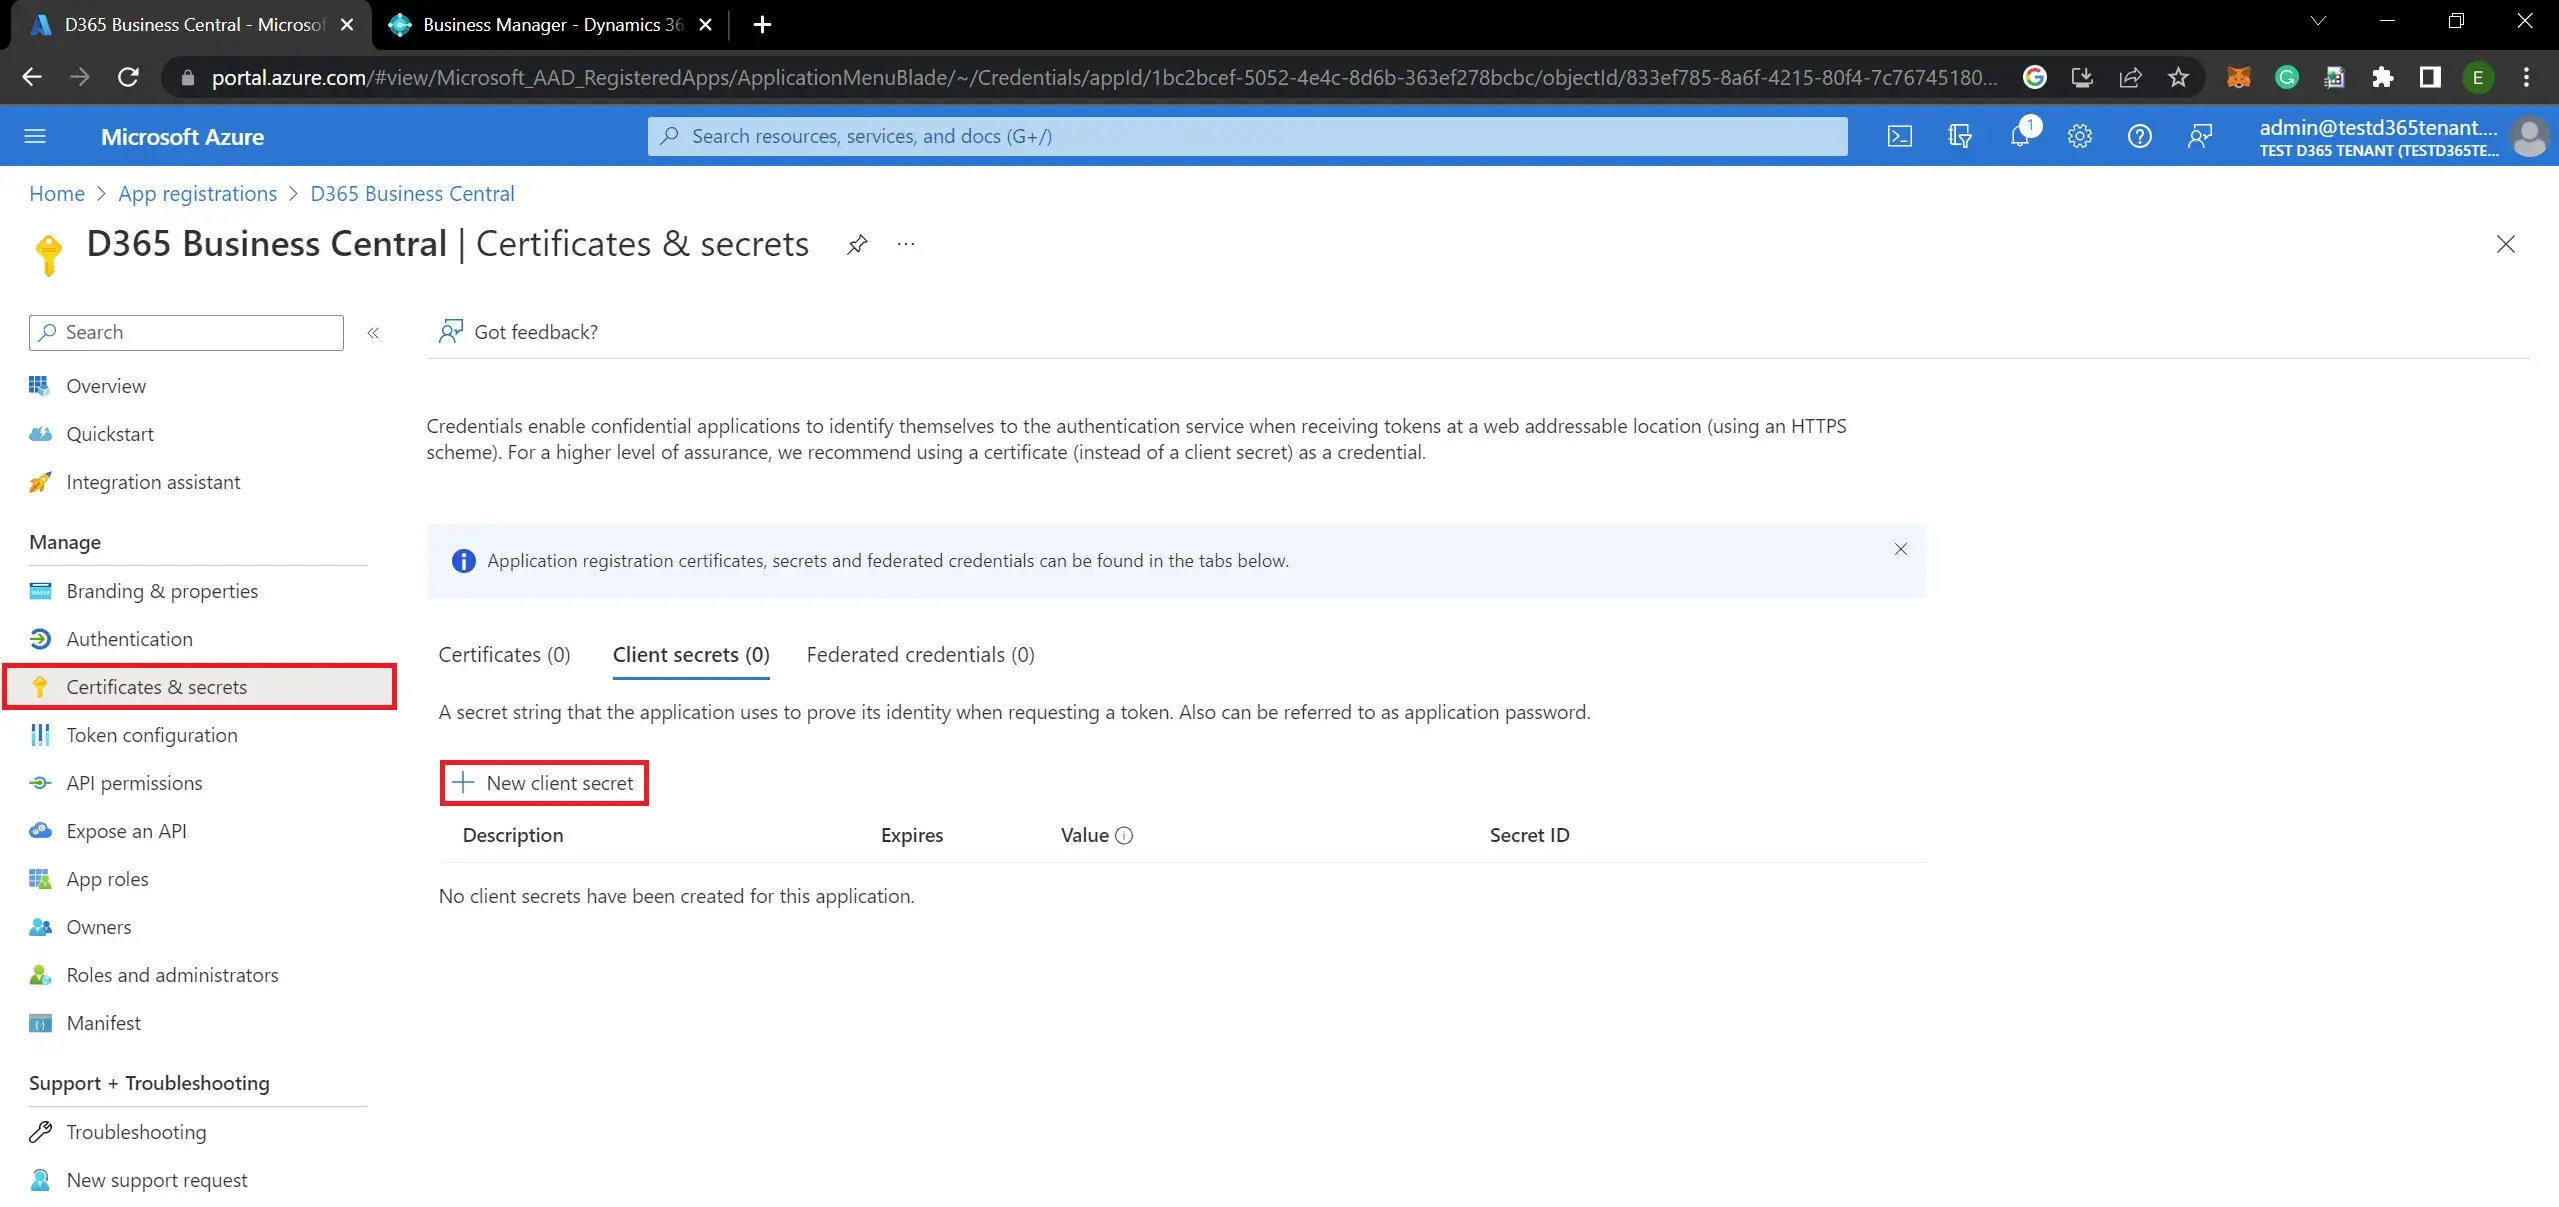
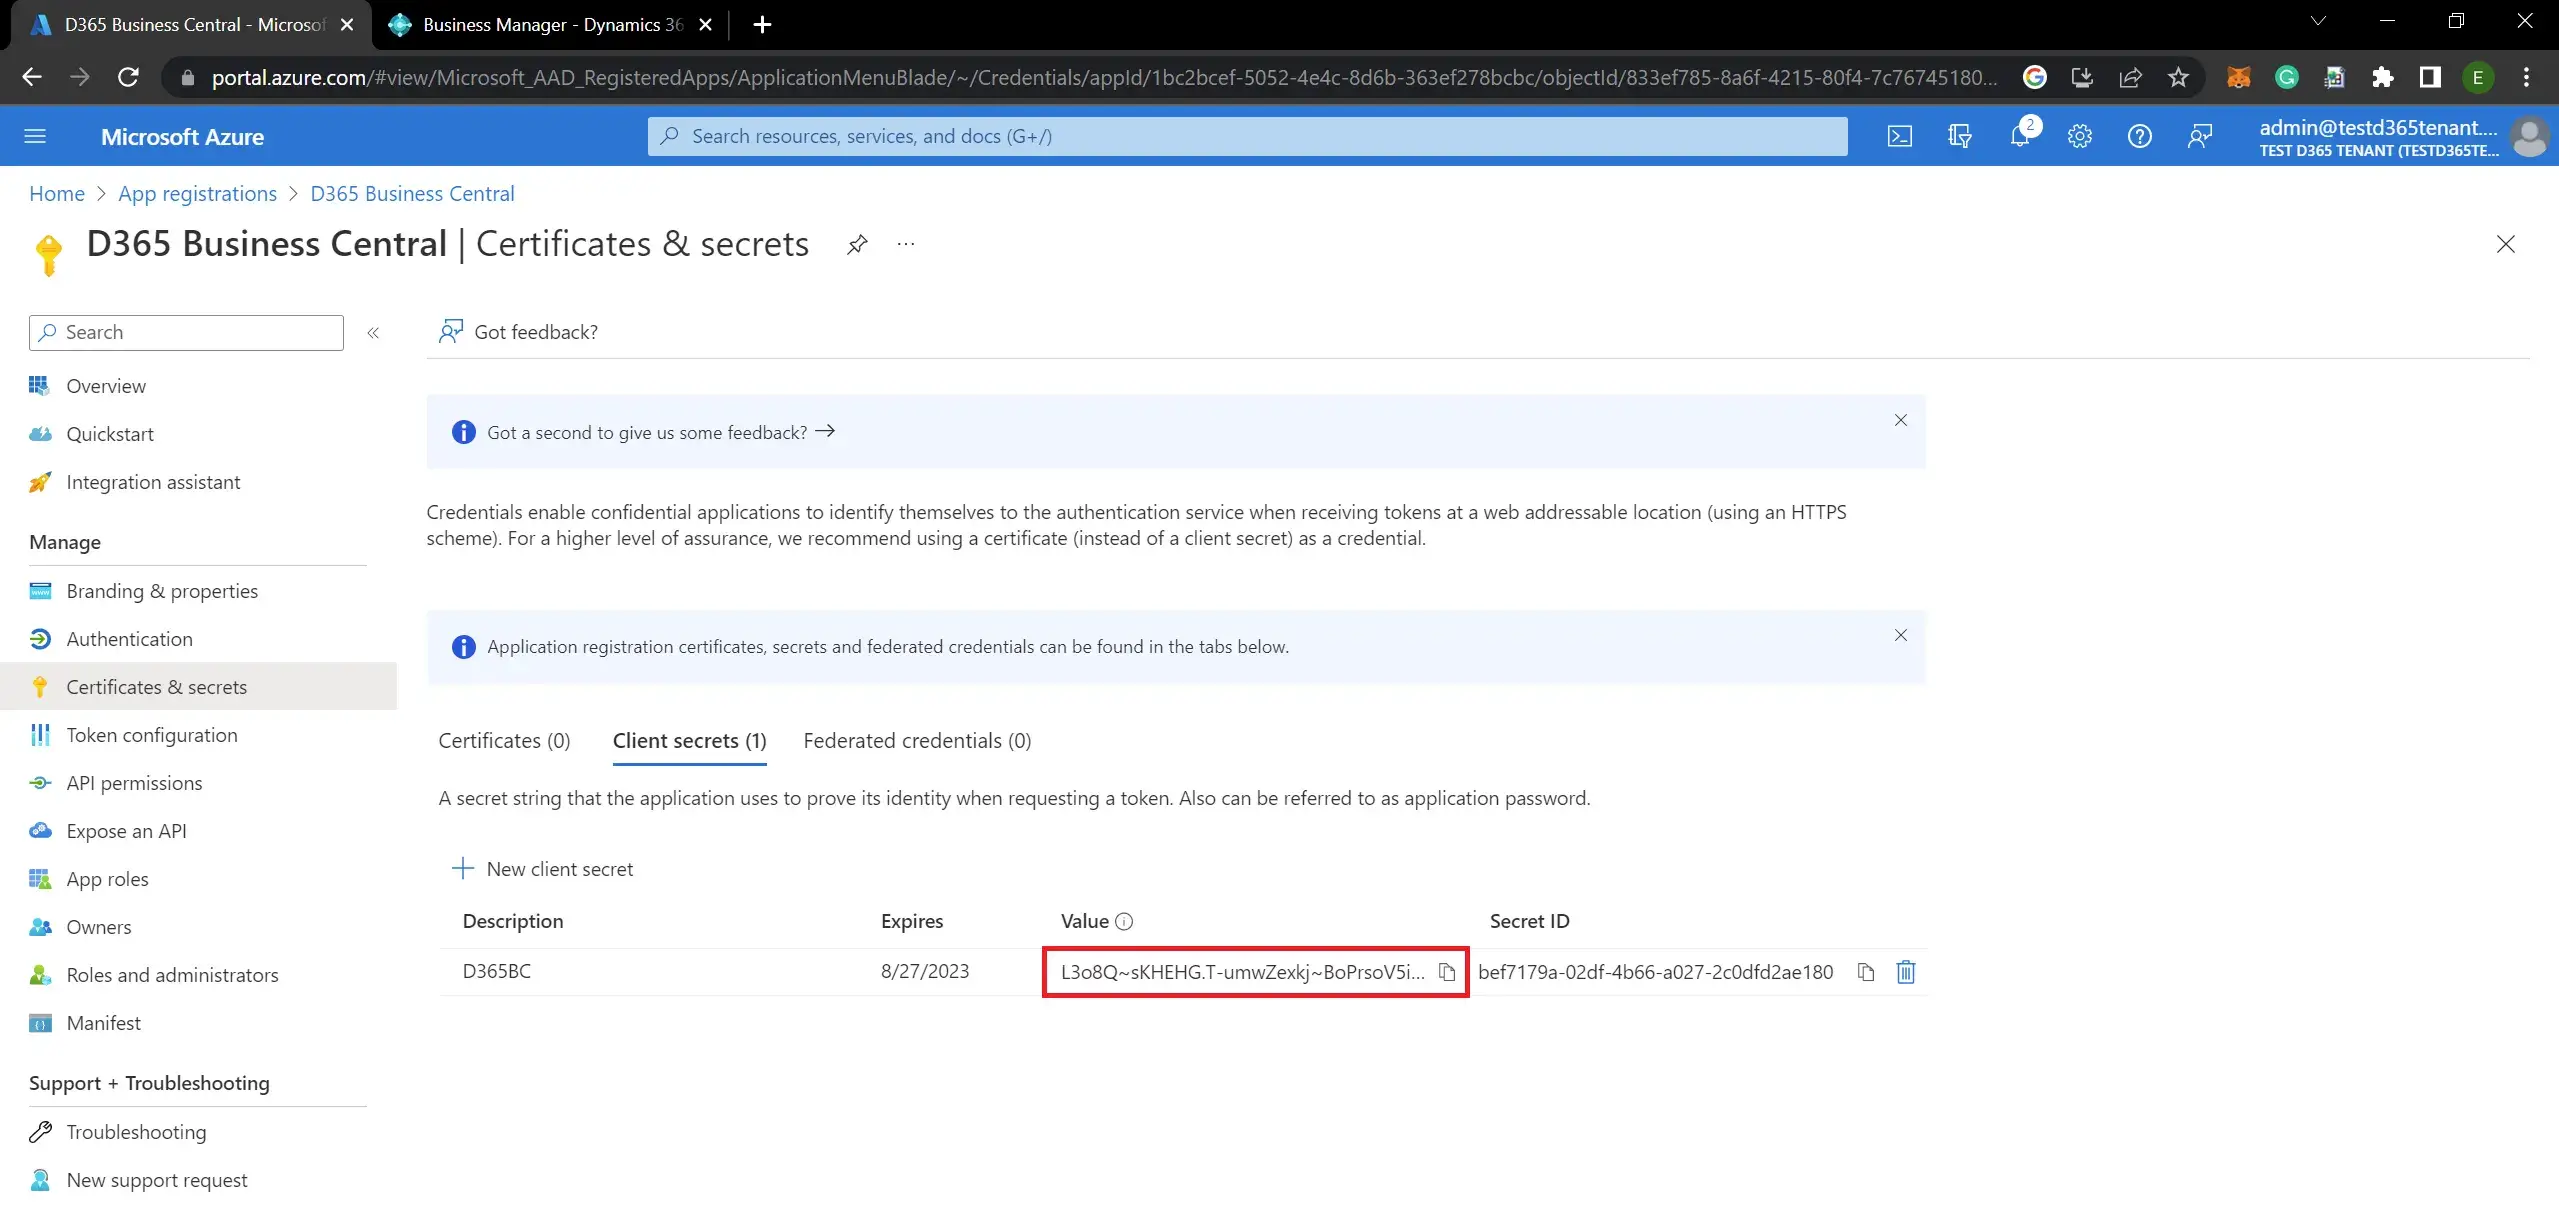
- Under “Certificates & secrets” click the “New client secret” button to create a new secret:

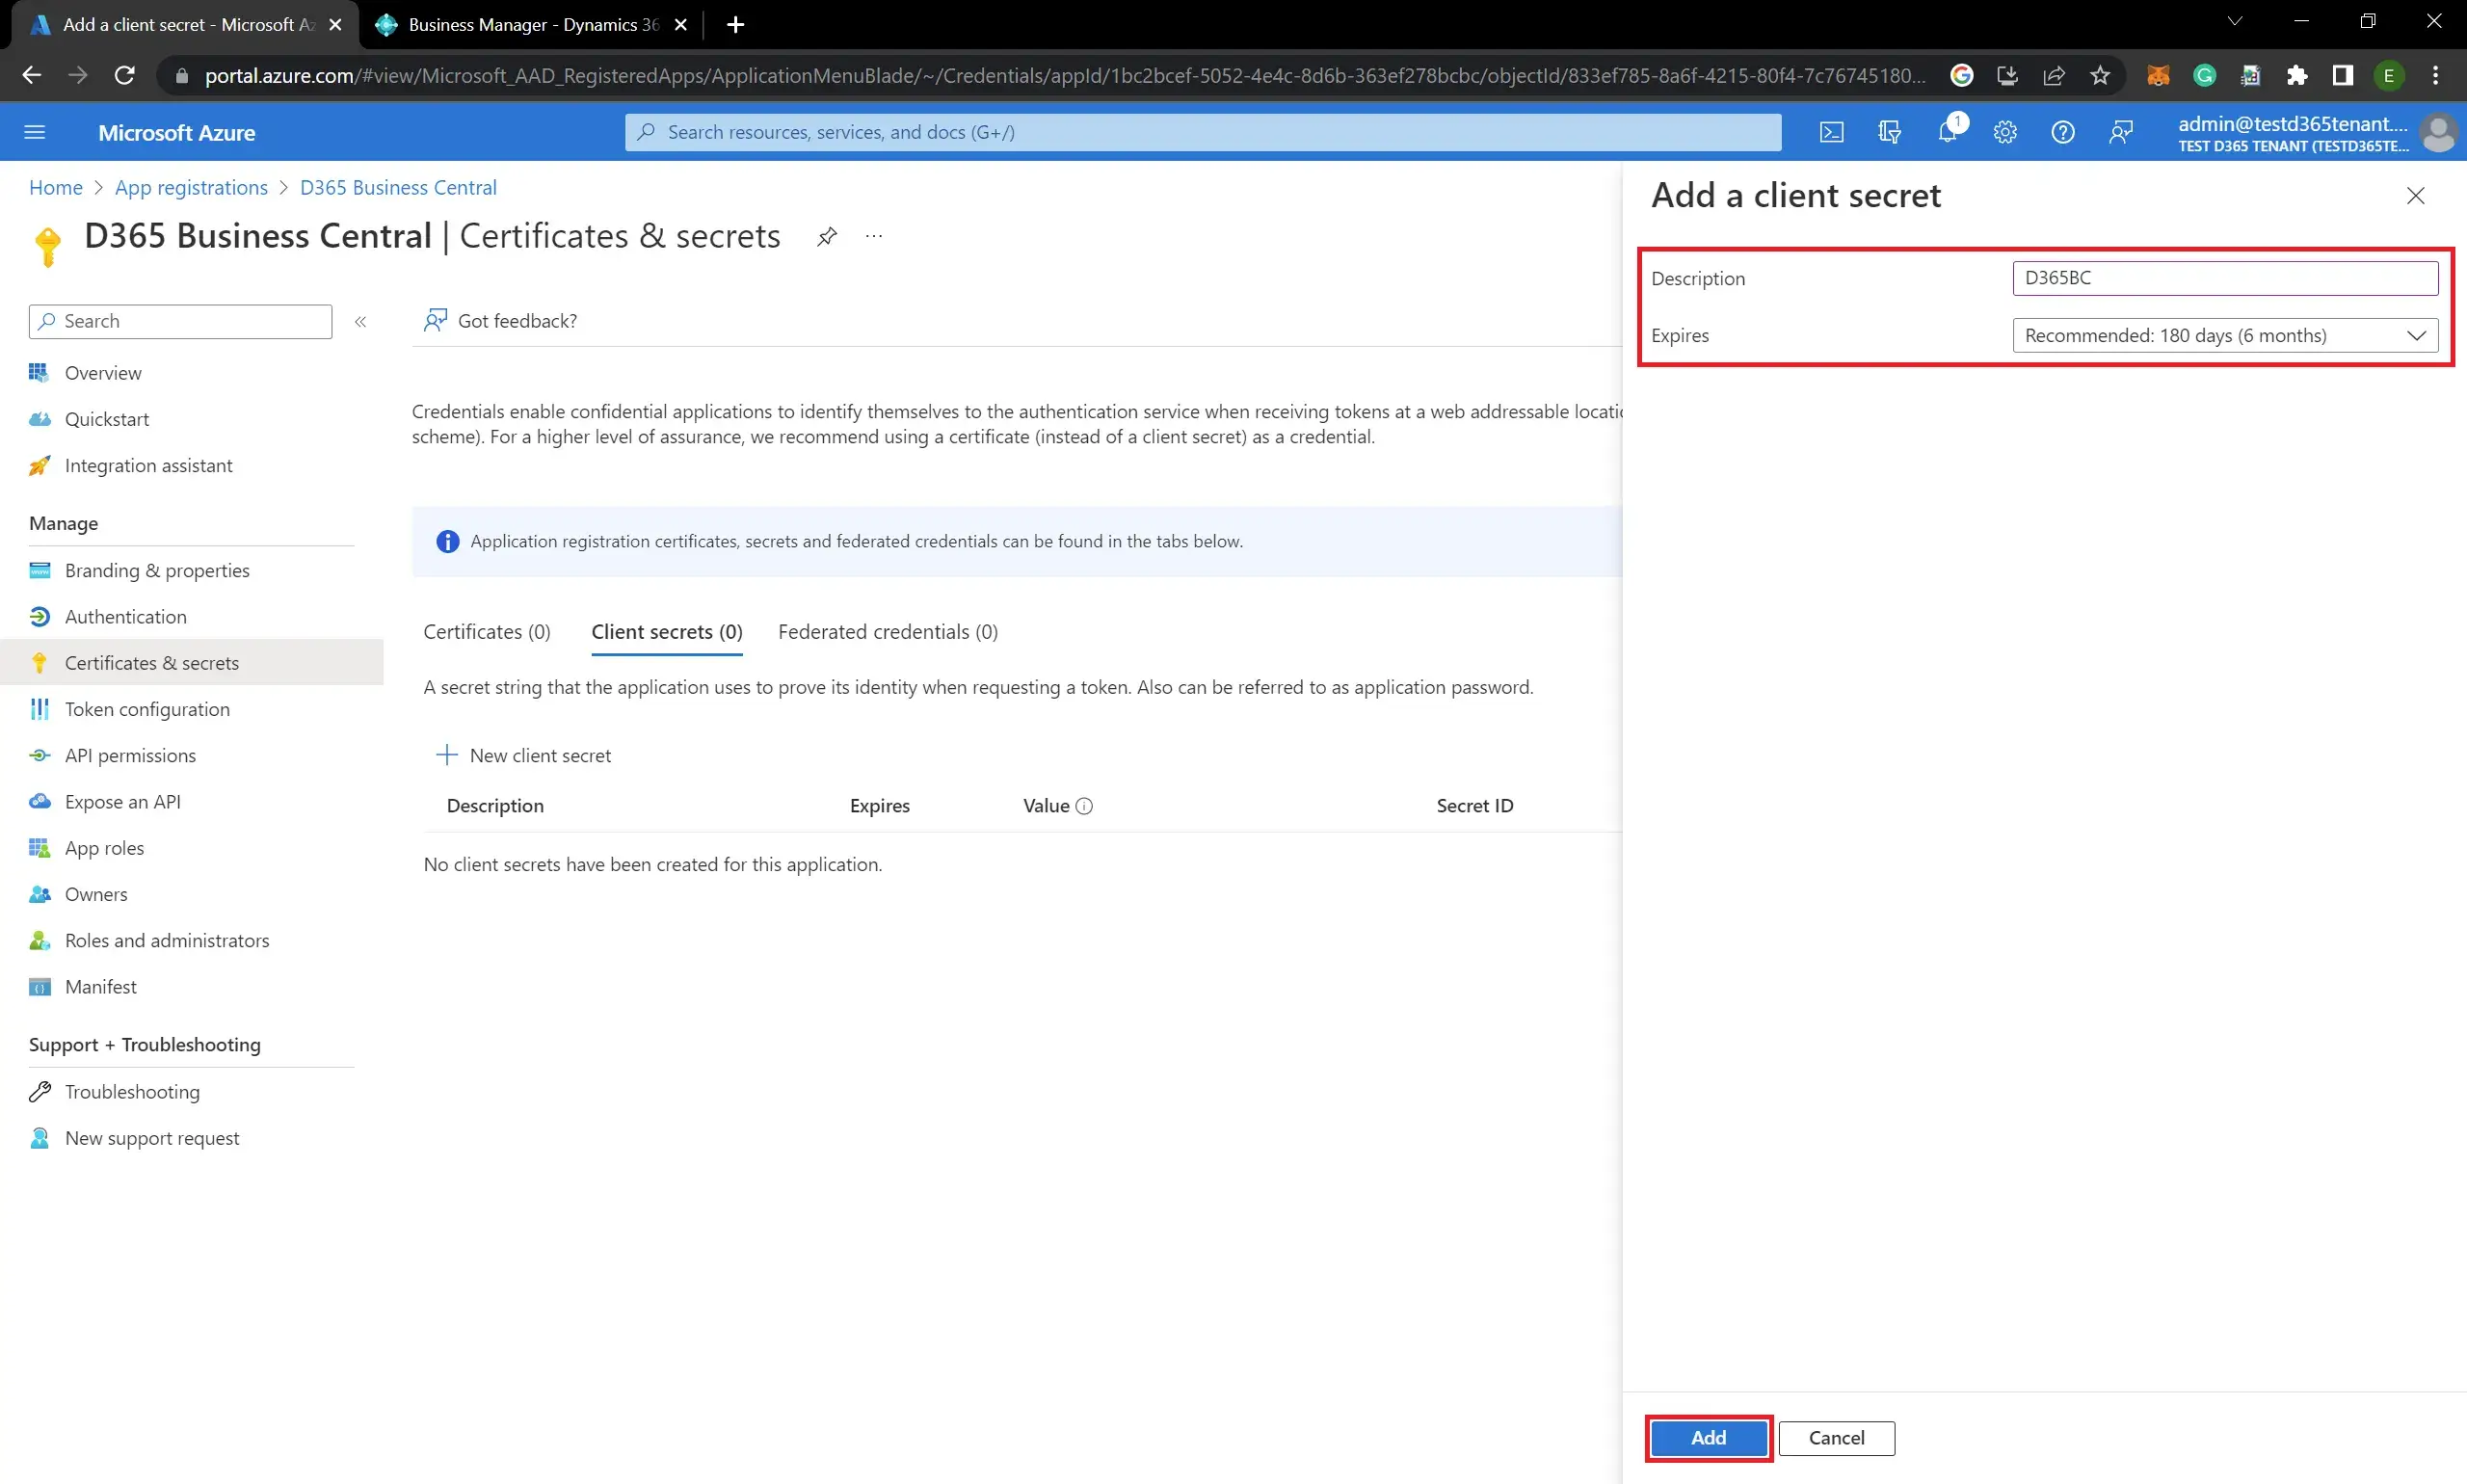
- Enter a description for the secret, select an expiration period, and click the “Add” button:
- Note down the value of the client secret, as you will need it later and it is visible only for the first time:
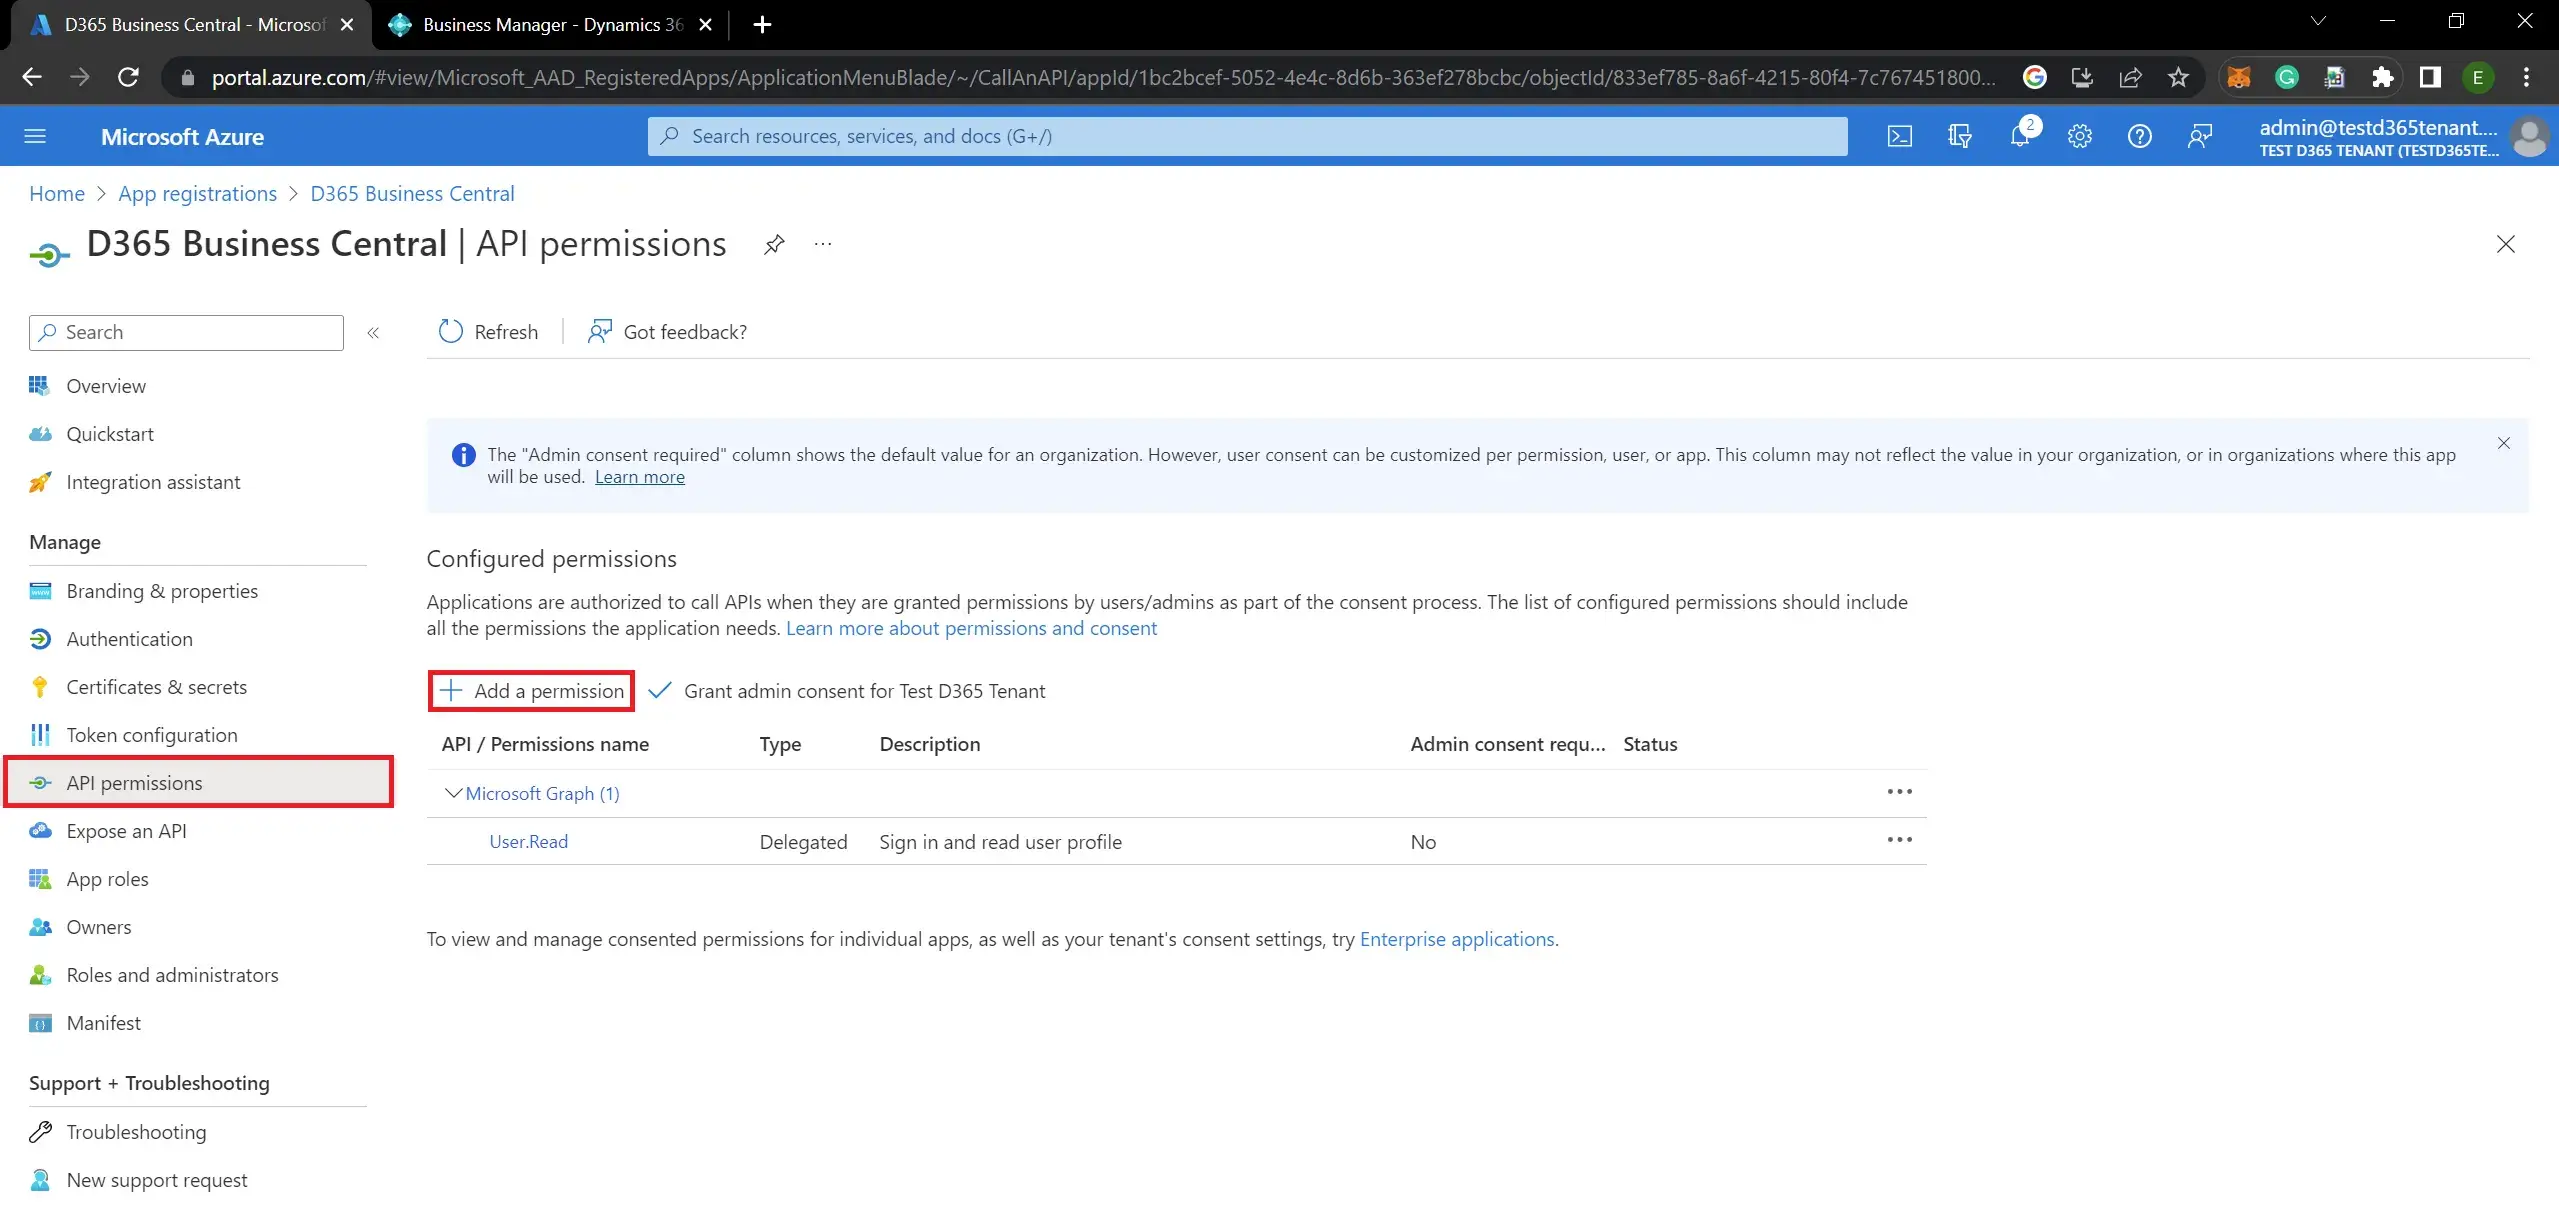
- Click on the “API permissions” tab, then click the “Add a permission” button to add permission to the registered BC app:
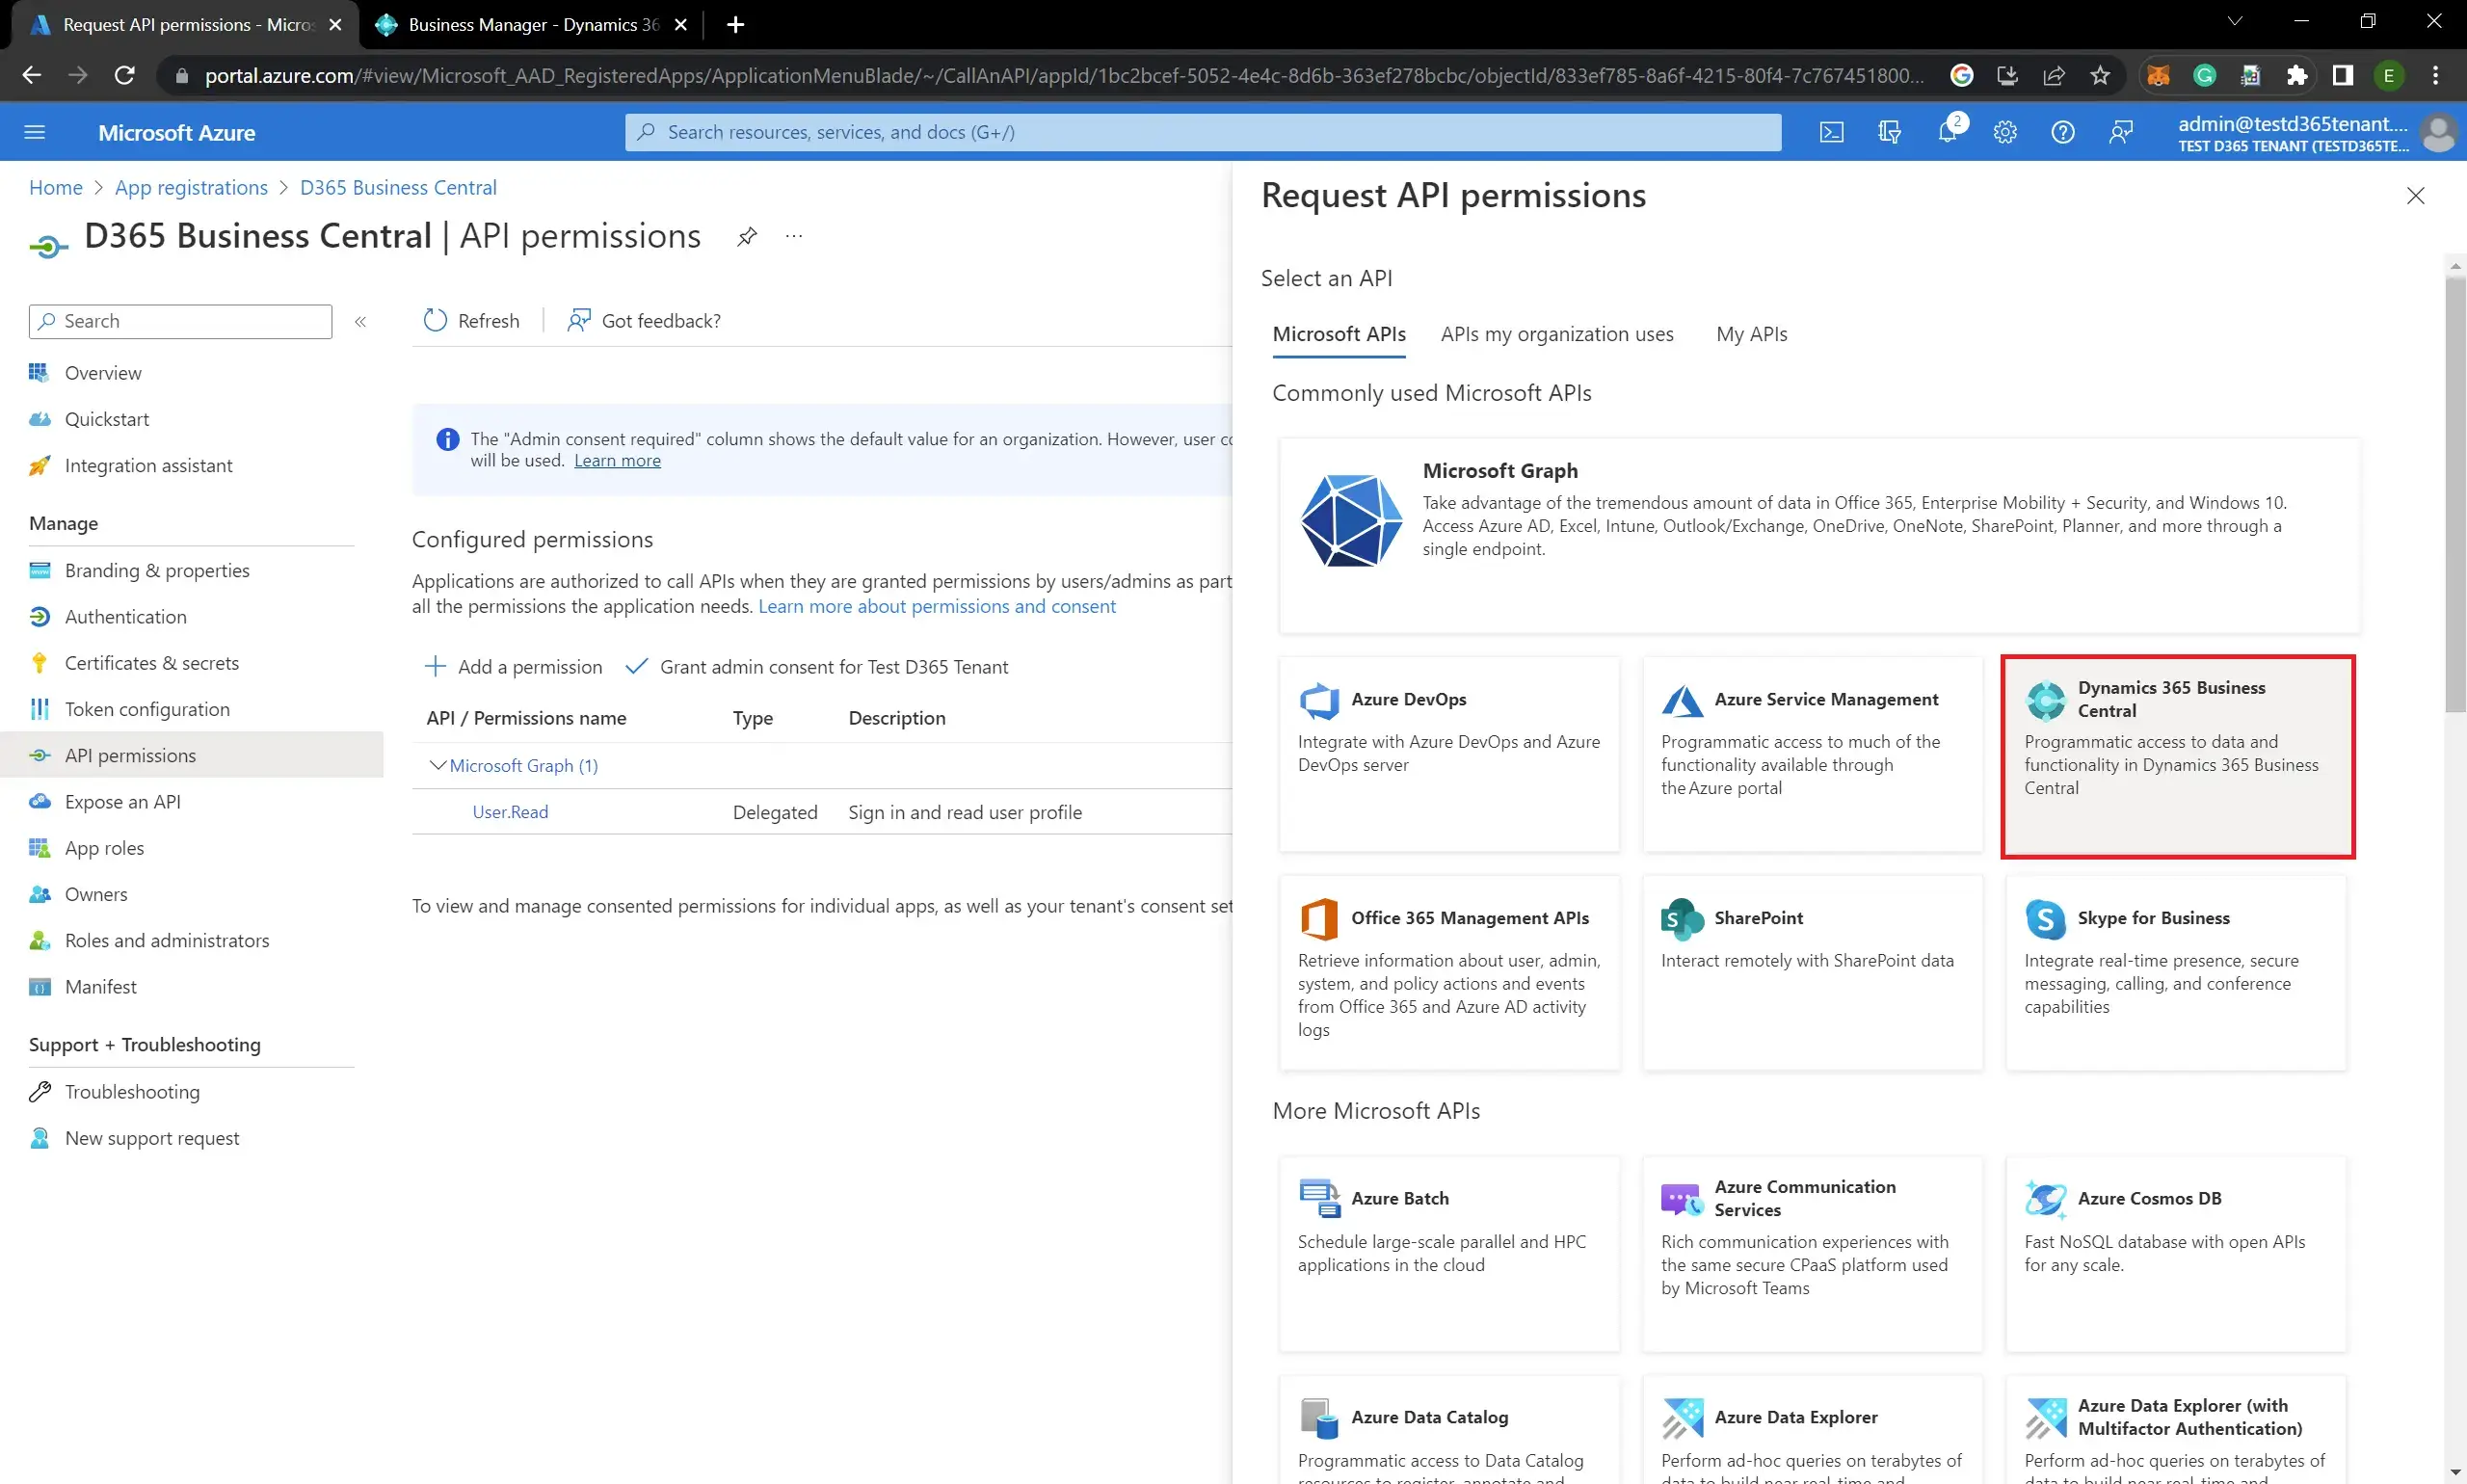
- Select “Dynamics 365 Business Central” from the list of available APIs:
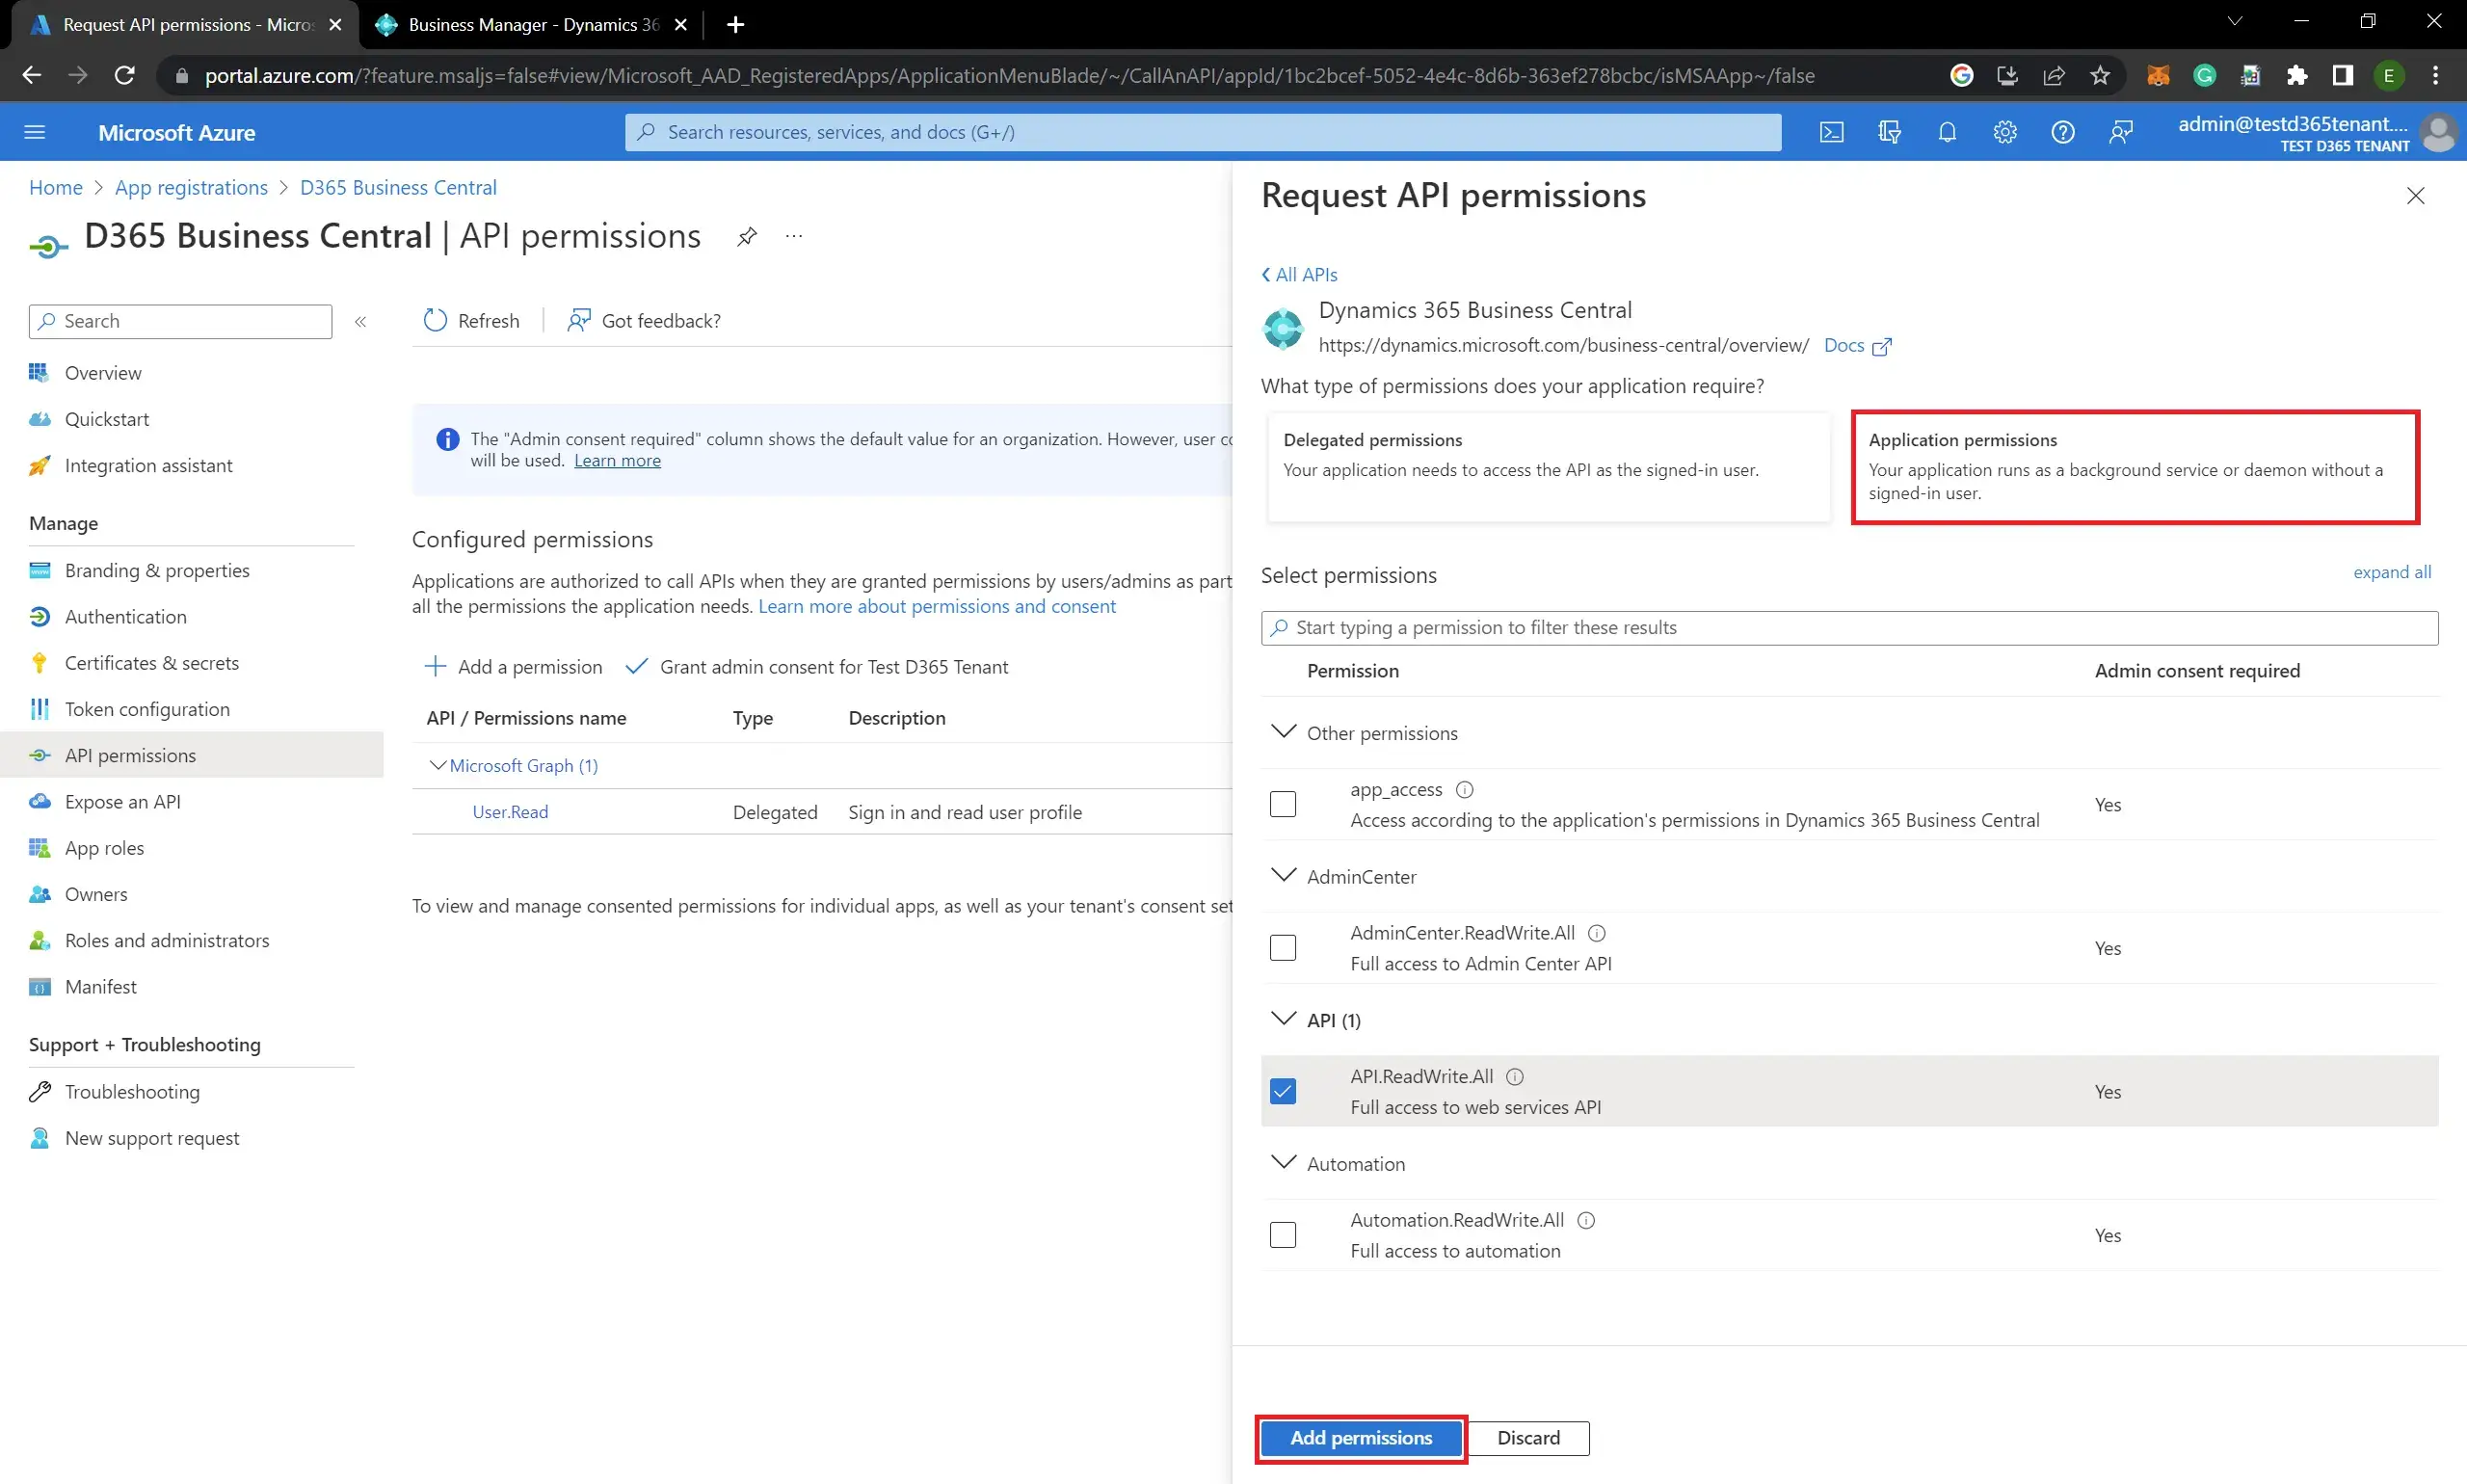
- Here you can select two types of permission (“Delegated permissions” and “Application permissions“). Check the required permissions and click on “Add permissions“:
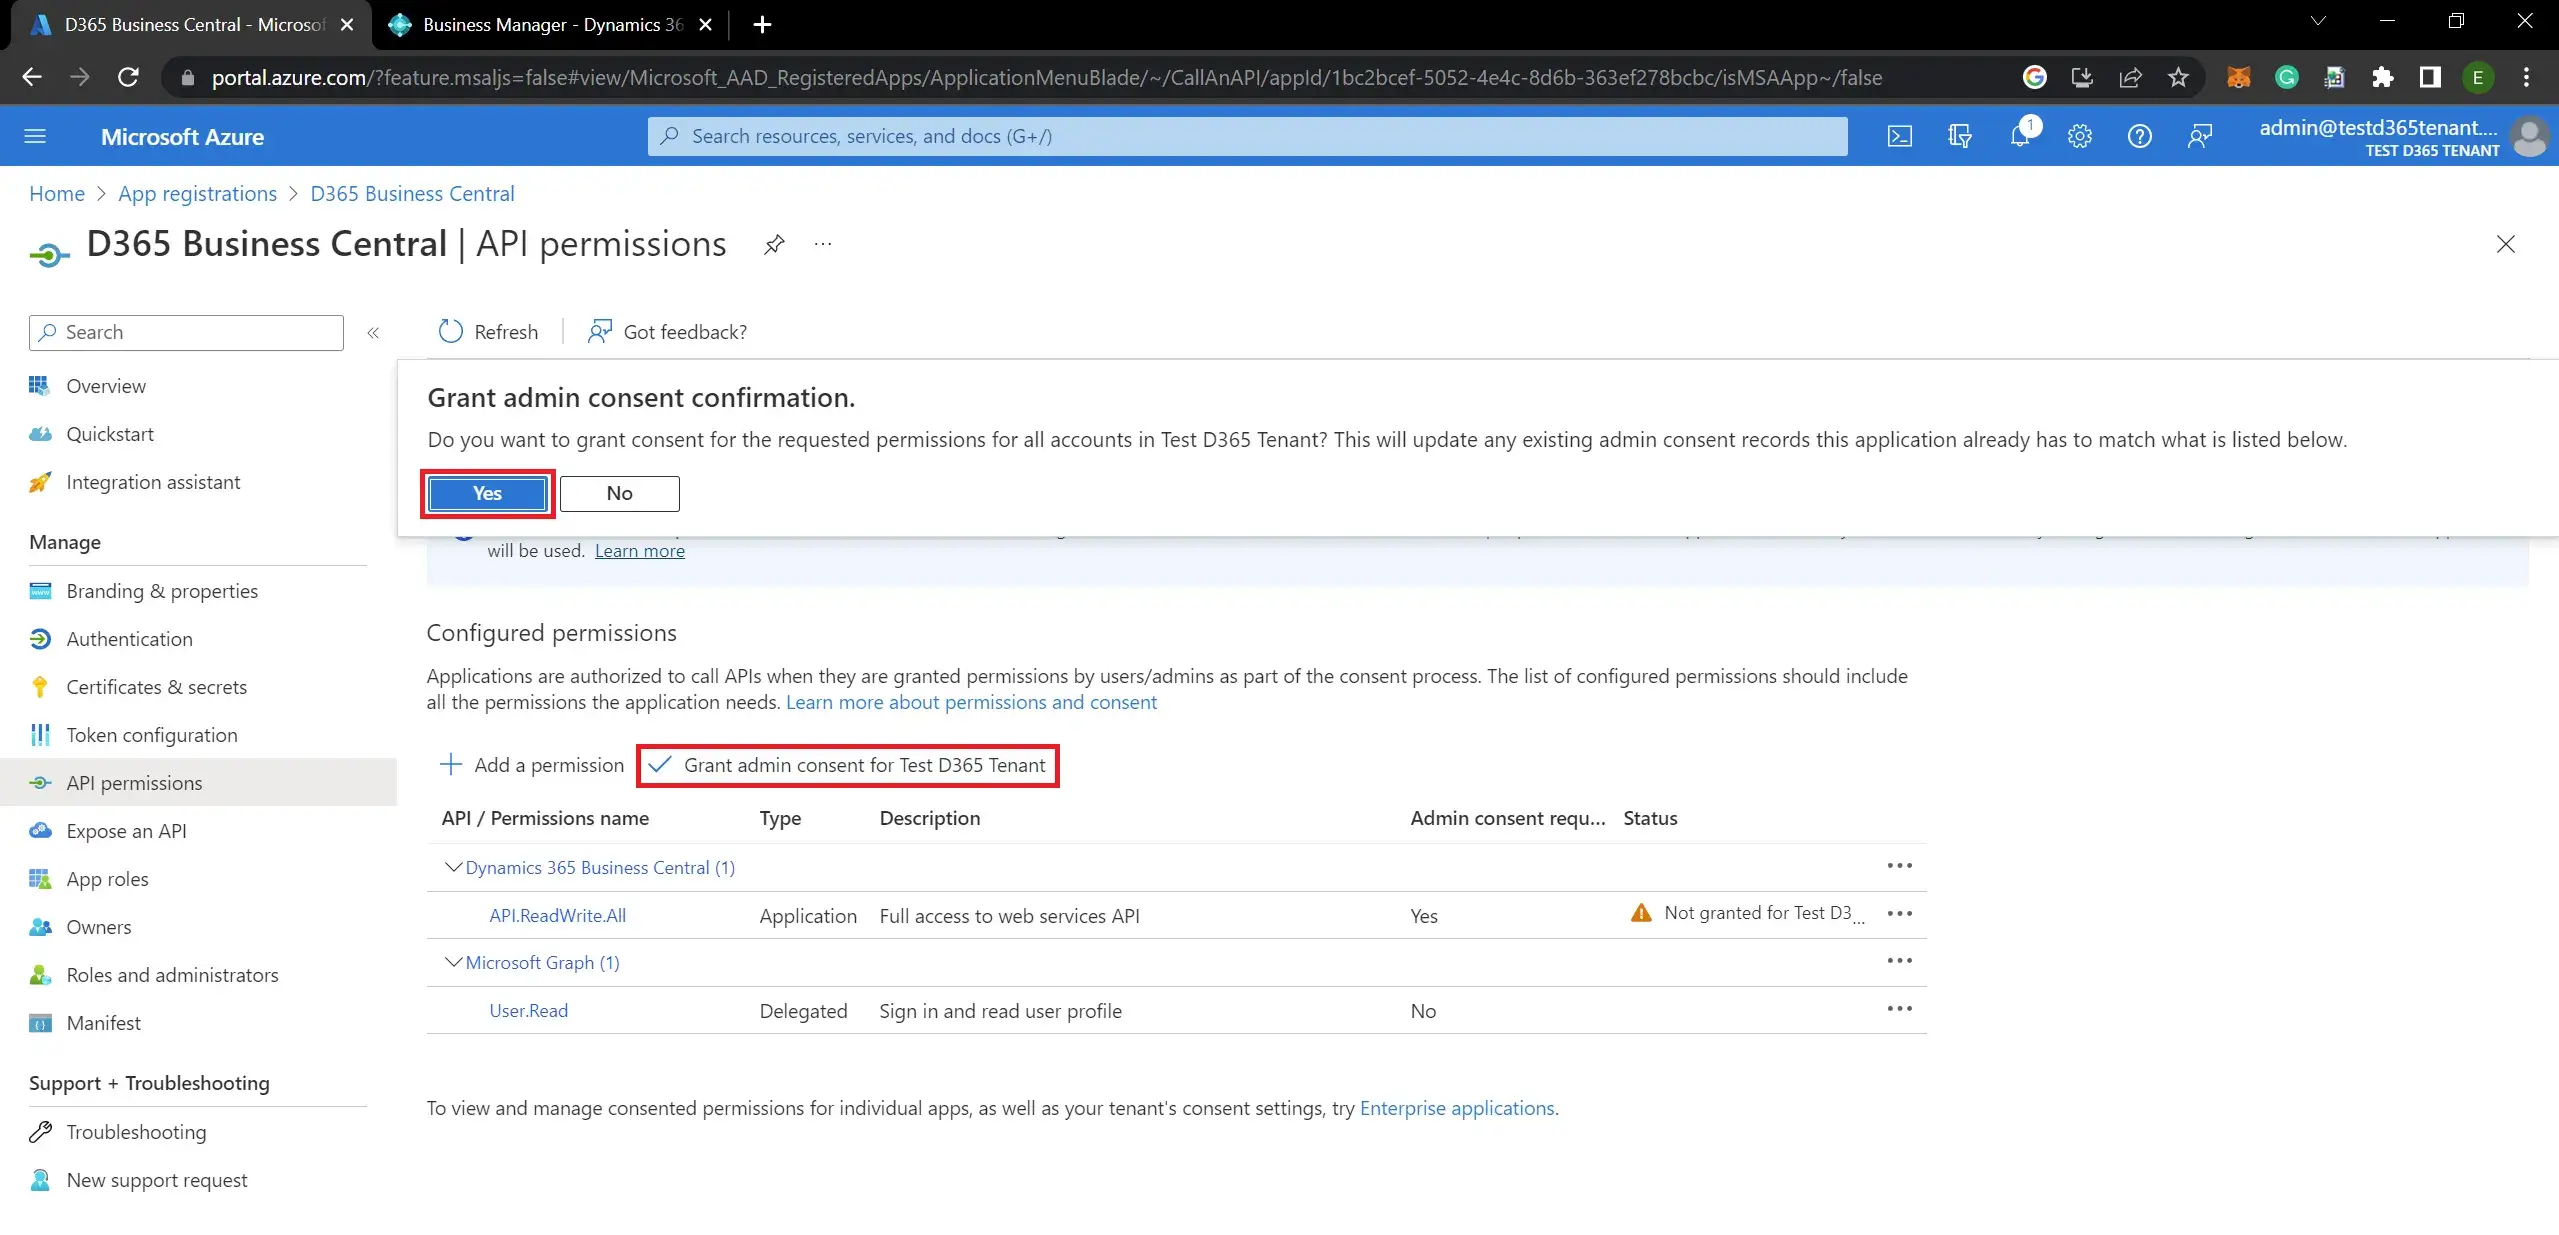
- Click on “Grant admin consent” and click on “Yes“:


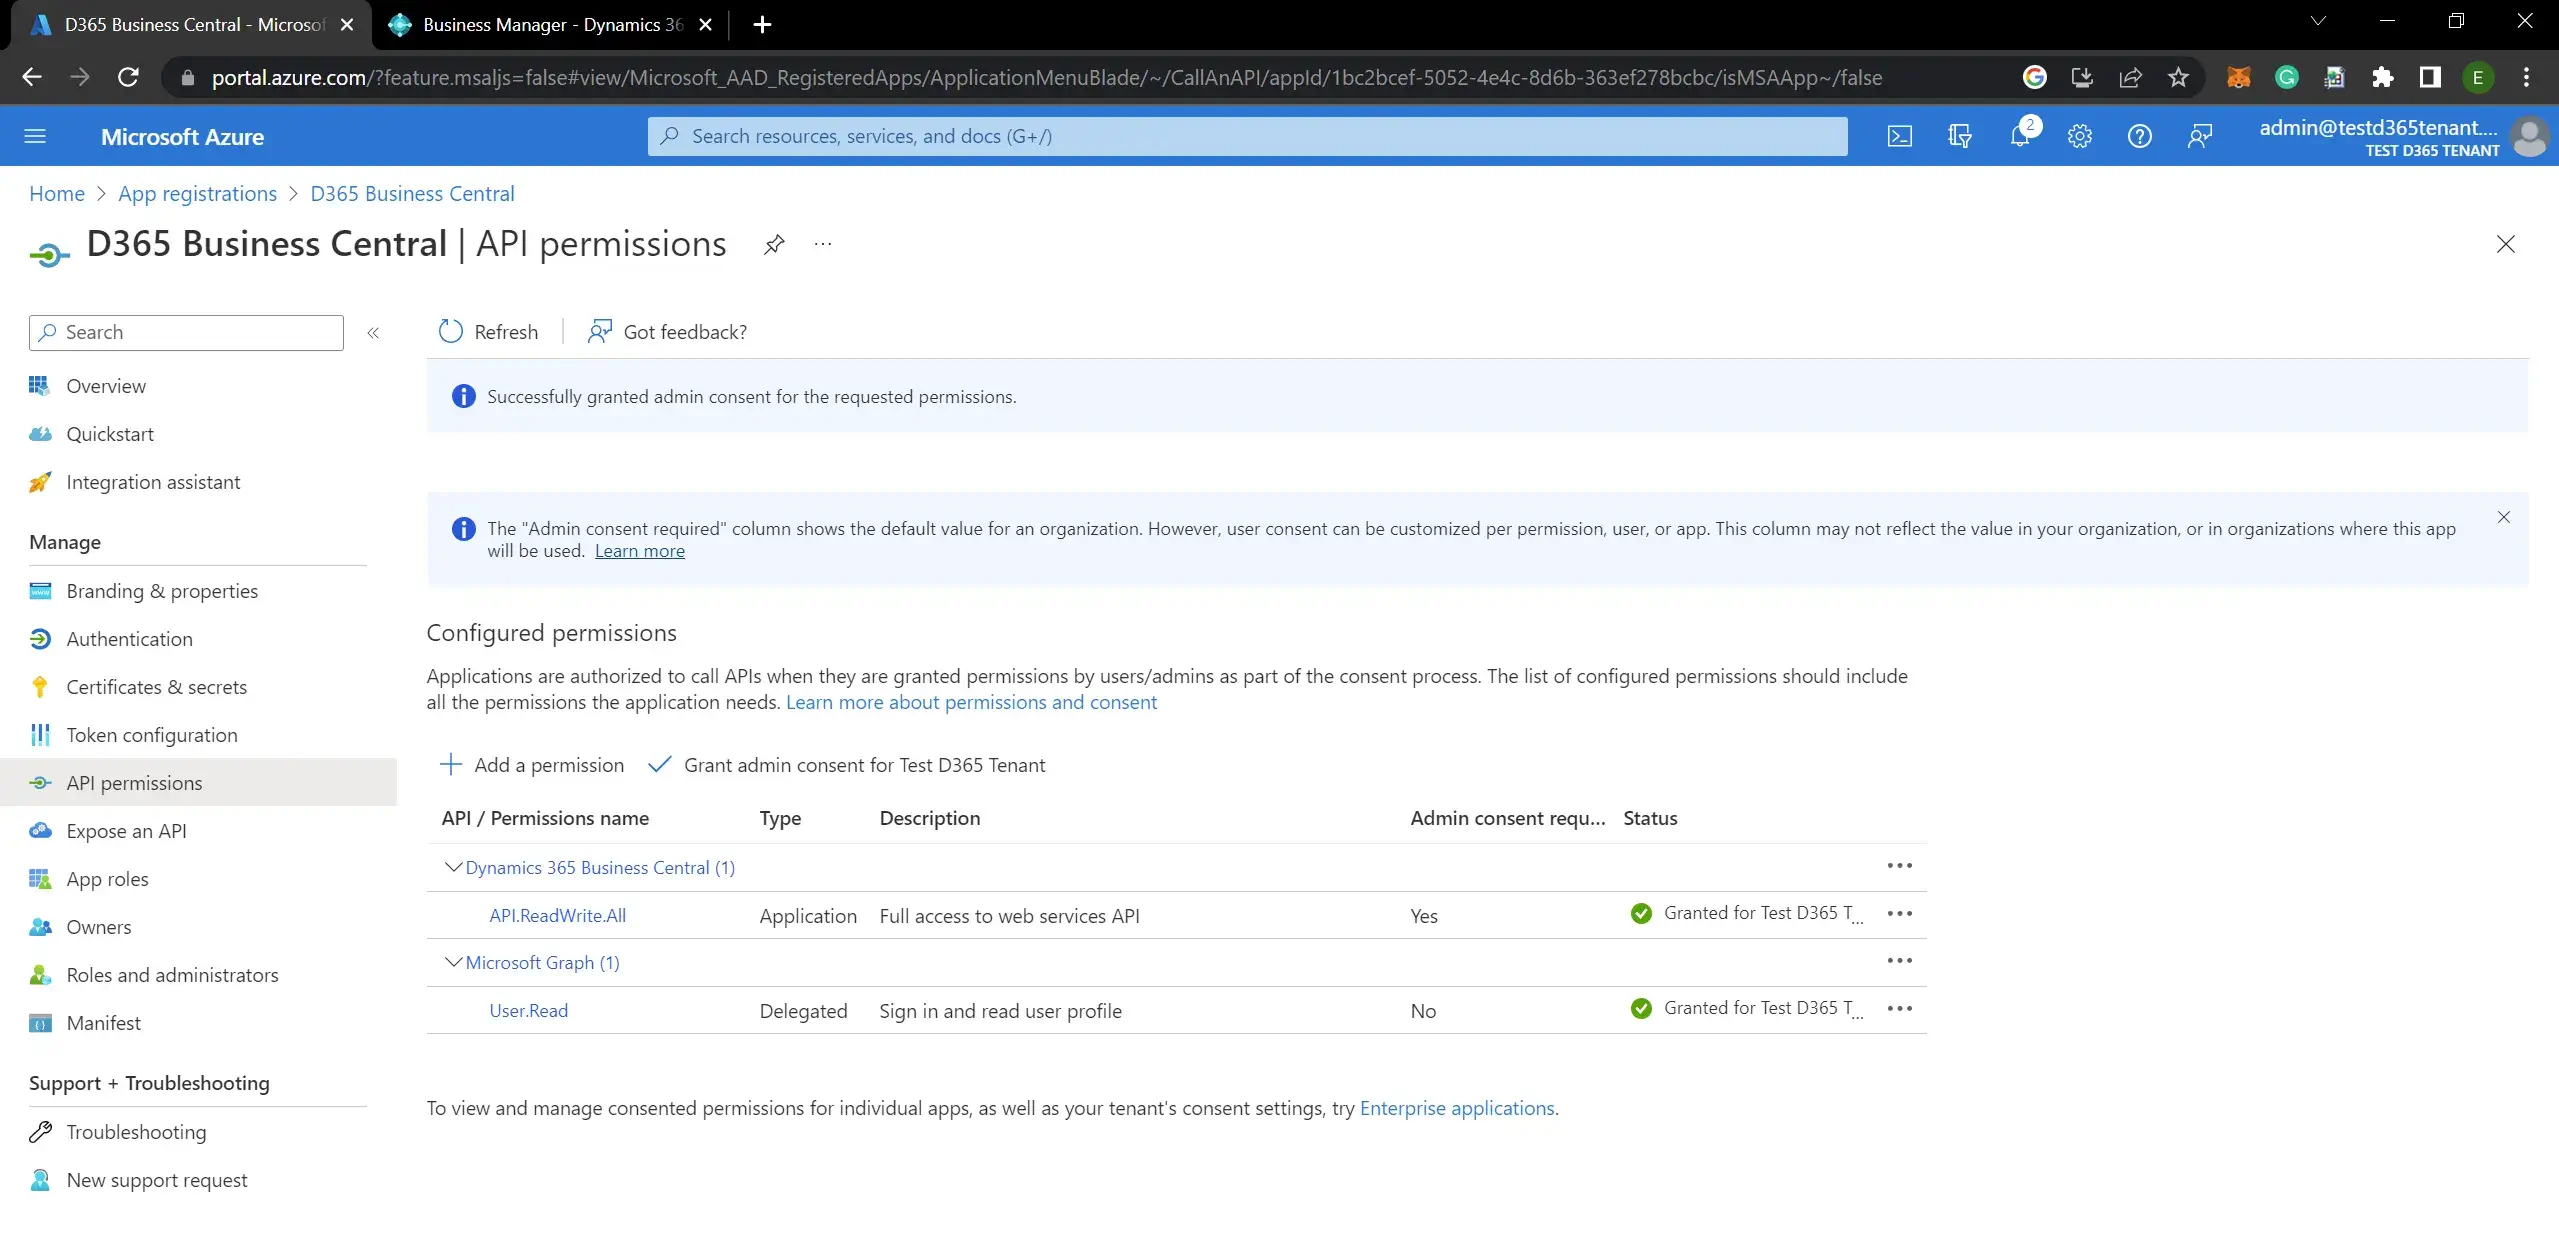
The Business Central app is now registered in the Azure portal and you can use it when accessing web services with OAuth authentication.
Visit the previous guide about how to create a new Azure tenant for install Dynamics 365 cloud App.
Vidura Dananjaya
Senior Solutions Architect - Microsoft Dynamics Navision / Microsoft Dynamics 365 Business Central and freelance developer. (The admin of NAVUSER)